Cheap and Easy Fixes for Motorcycle Jacket Zippers, Snaps, Tears and Holes
 Joanne Rushton
left for contents
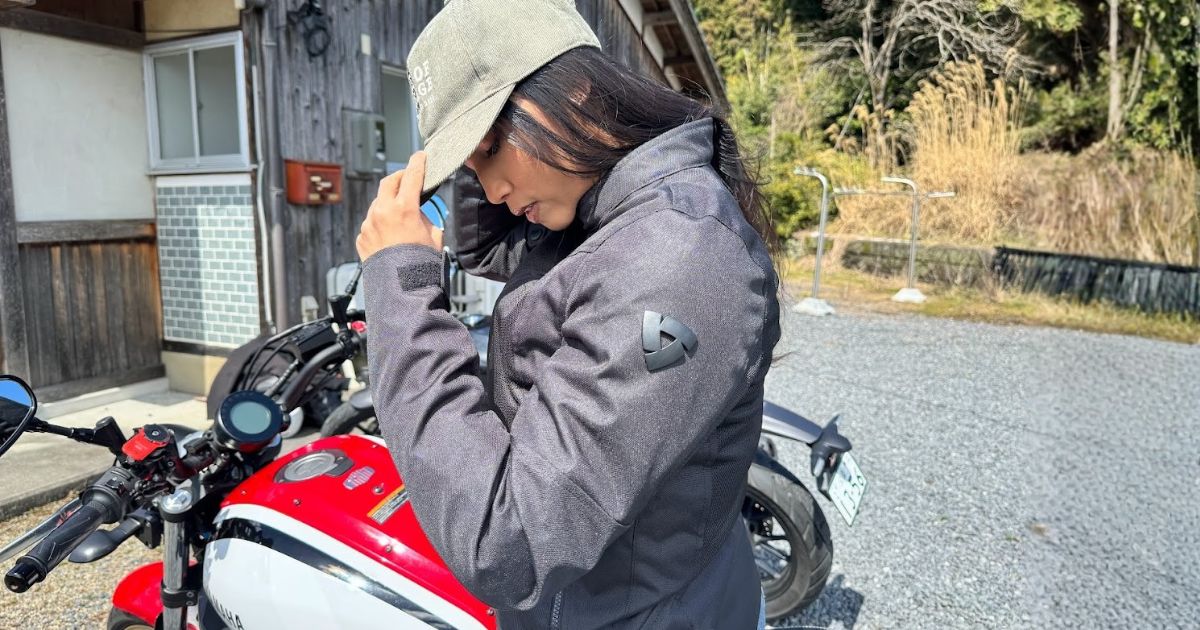
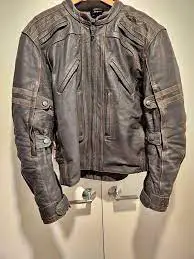
So you have a beat up old motorcycle jacket?
Whether you took a spill or unearthed a great classic from the depths of your closet, you need to make some fixes before you’re ready to ride in that bad boy again.
Repairing a motorcycle jacket is often cheap and easy, if you know where to look for supplies and tips. Problem is, most riders don’t – so I put everything in one place.

This article has all you need to know to fix a zipper, snap, tear or hole on any jacket: whether it’s Cordura, denim or good old cowhide leather.
Before you drop $500 on a new jacket, read this.
Skip to the sections relevant for you and your jacket.
Not Sure What Size to Order? Get Our Gear Fit Guide.
Sizing charts for helmets, jackets, gloves & boots — with brand-specific fit notes and pro tips so your gear fits right the first time.
- Helmet sizing by brand
- Jacket, glove & boot charts
- Head shape guide
- Between-sizes tips
How to Repair Holes and Rips on a Motorcycle Jacket
When it comes to fixing rips and holes, pay attention to location, material, and stitching. You wouldn’t slap a band-aid on a gaping wound, would you? So don’t slap any old fabric on your ripped jacket.
As for material, replace like with like. Leather should be replaced with equally strong and thick leather. As for Kevlar, Cordura, and other fancy fabrics, it’s crucial to patch with the same material with equal or great denier (abrasion resistance). Do not patch the seat of your motorcycle jeans with plain ol’ denim – that’s like fixing a card door with a piece of cardboard!
Where to get these special materials, you ask? I’ll get to that in a moment.
As for location, be extra careful mending anything at the elbows, shoulders, and lower back area as these are most prone to sliding in a crash. The material and stitching in these areas must be super strong.
Want in on a little secret? Small incidental tears in non-critical areas of your leather jacket can be fixed with glue and leather coloring (were you in a knife fight by chance?). But for those critical slide zones, attach a leather patch firmly to add some character and protect your skin.

As for stitching, always use an extra strong thread like ballistic nylon. Anything else will disintegrate on first contact with pavement, and there goes your patchwork. Double or triple stitch is critical as well, and it’s what most tailors get wrong.
How do I find the right materials?
Finally, I get to the good stuff. To find the right patch material (like Cordura) and thread, try visiting a fabric store, tailor, shoe repair shop or even boat cover maker in town. If you go to a tailor, ask them if they’ve worked with motorcycle or equestrian gear – they’ll understand the strength you need.
Any shop that creates or mends custom leather or high-strength fabric items is a good place to start. If you don’t want to bother doing the job yourself, they can also quote you a price to repair any holes, rips, zippers, snaps etc.
For other ideas on where to get professional repairs done, see that section down below.
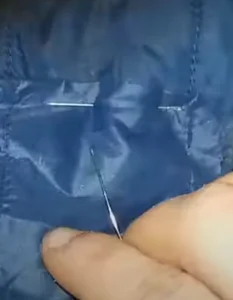
Sewing up a Hole or Rip
Ready to start mending? Get the following supplies:
- Your trusty jacket with the pesky hole
- A small piece of matching fabric as your patch
- Ballistic nylon thread
- A sewing needle suitable for heavy-duty fabric
- A pair of sharp scissors
- Some pins or fabric clips (to keep everything in place)
Then follow these steps:
- Position the Patch and Secure It
- Place the patch over the hole, ensuring it covers the entire damaged area with some margin to spare. You want a buffer zone around the tear. Once you’ve found the sweet spot, pin or clip the patch in place.
- Start Threading
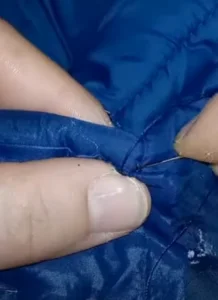
- Thread your needle with the ballistic nylon thread and tie a knot at the end. Starting from the inside of the jacket, push the needle through the fabric, just outside the edge of the hole, and then through the patch. Make sure to catch both layers of fabric.
- Sew with a tight pattern (look up whipstitch or blanket stitch). Keep the stitches close together and consistent to ensure the patch stays put during those high-speed adventures. Go around at least twice; three times and across the middle several times is even better.
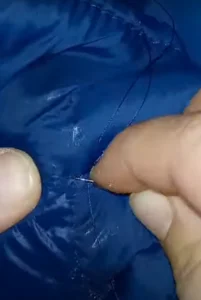
- Secure the Patch and Admire Your Work
- Once you’ve stitched your way around the entire patch, finish off by tying a secure knot on the inside of the jacket (a strong backstitch). Trim any excess thread.
- Give yourself a pat on that patch. Nice work.
How to Fix Zippers and Snaps on a Motorcycle Jacket
Zippers have to be the most annoying but most useful thing on Earth. Love them when they work, loathe them when they don’t.
Thankfully, most zipper problems can be fixed for under five dollars and five minutes.
Here’s how.
Quick Fixes for a Stubborn Zipper
If your zipper is still kinda working but needs some TLC, try these quick fixes:
- Rub some graphite (pencil lead) or olive oil along the teeth to lubricate the zipper. Use a toothbrush to rub it in and brush out any dirt jammed in there.
- Gently realign any misaligned teeth with a pair of needle-nose pliers.
- Reattach any separated zipper halves by opening the slider all the way to the bottom and carefully guiding the teeth back together.
Still not solved? Most likely you have a problem with your zipper pull.
Fixing a Broken Zipper Pull
So your motorcycle jacket’s zipper pull decided to go AWOL and won’t glide up and down smoothly anymore? Replacing it is easier than you think, as long as the teeth of the zipper are all still fine. Grab yourself a pair of pliers, wire cutters, and a shiny new zipper pull, and let’s get to work.
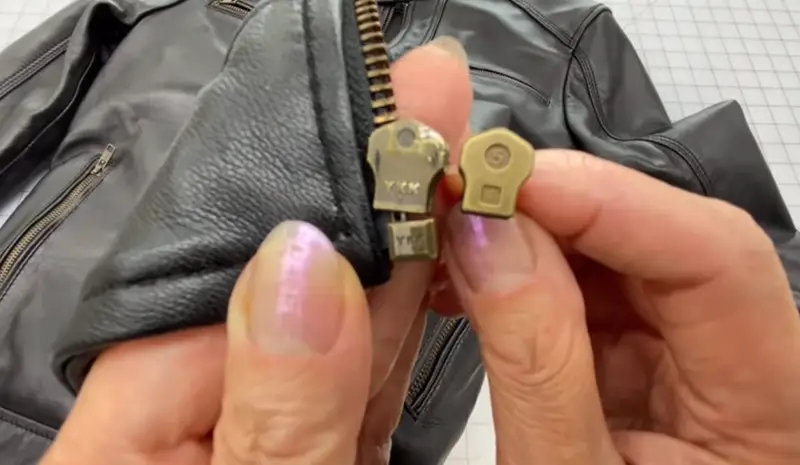
- First, check the size of your zipper (it’s usually stamped on the back of the zipper pull or bottom stopper). Size matters!
- Purchase a replacement zipper pull of the same size and style. Pulls are usually made for metal, coil, or plastic zippers. Look at your zipper and decide what will probably work best. This isn’t an exact science. This Moto Kit from Zipper Rescue will probably have you covered.
- Use the wire cutters to remove the stopper at the top of your zipper, slide off the old zipper pull and slide on your new one. Test that it works as it should. Then put that old stopper (or a new one) back on the top with your pliers. This YouTube tutorial has you covered.

If your zipper has broken teeth, you’ll need to replace the whole thing.
Replacing the Entire Zipper
When your zipper is beyond repair, it’s time to perform a full replacement. Here’s how to do it:
- Carefully remove the old zipper from your jacket with a seam ripper or scissors.
- Purchase a suitable new zipper (waterproof or regular, depending on your jacket’s needs).
- Pin or clip the new zipper in place, aligning it with the original stitching lines.
- Sew the new zipper onto the jacket using a double stitch and trusty ballistic nylon thread.
- Test your handiwork by zipping and unzipping the jacket a few times.
Booyah, time to hit the road.
Zipper replacement can be a rough DIY project, so you might want to trust this one to a shoe shop or other repair shop.
Fixing and Replacing Jacket Snaps
Metal jacket snaps get bent and torn off too easily, but thankfully they’re easy to fix.
Try these easy tricks to fix distorted jacket snaps at home:
- Gently tap the snap back into shape with a small hammer or the flat side of a butter knife.
- Use needle-nose pliers to carefully bend any misaligned parts back into position.
Too far gone? You’ll need to replace them.
- Buy a quality snap kit that includes a punch and die set for easy installation. This kit on Amazon is well-priced, comes in multiple colors (brass, black, silver, gold, or mixed), and includes the tools to install the snaps yourself.
- Remove the old snap parts from the jacket using a pair of pliers or a flathead screwdriver. Pull up the edges until you can pull the snap out from the middle – you don’t want to tear out fabric with the old snap.
- Follow the kit’s instructions to install the new snaps. Give them a test snap to ensure they’re secure and ready to ride!
Congratulations, you just saved a few hundred bucks not having to buy a new motorcycle jacket.
Replacing Armor in a Motorcycle Jacket
Imagine discovering your armor is falling apart just days before a cross-country motorcycle trip. Not just cracking, I’m talking turning to dust in your hands and leaving black powder all over the house like a broken urn.
Why am I being oddly specific?
This happened to my dad not too long ago. He discovered the armor in his old motorcycle jacket literally turned to dust while it was on holiday in the garage.
Here’s what he replaced his armor with that I’d recommend for you too.
For shoulder and elbow armor, my dad picked up a set of SAS-TEC armor. Throughout his trip he commented on how thin they were and how they didn’t block airflow at all. I have a set of D3O that are great as well.
If you don’t like the look of those, check out what Revzilla has on offer. I like shopping there for two reasons: they run sales often, and I know everything they carry is what it seems – there are no scams or misleading listings like you get on Amazon.
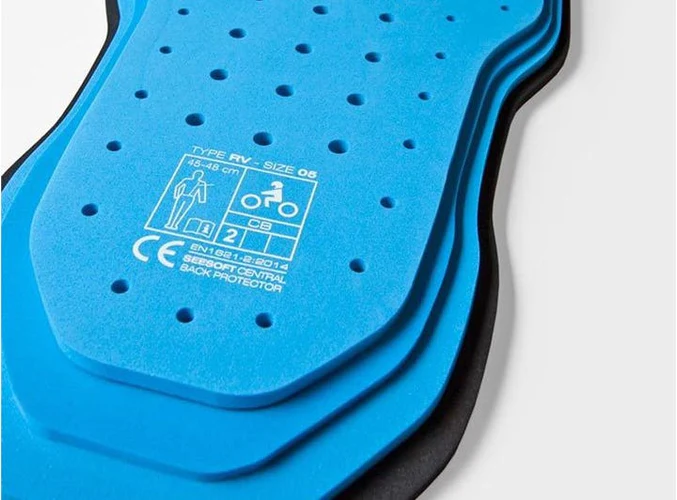
For back protectors, my dad picked up an Alpinestars Nucleon (available in small, medium and large). Thankfully he hasn’t crashed in it yet, but he said like the SAS-TEC armor it feels like it isn’t even there. I also like the REV’IT! Seesoft Air Back Protector and D3O Viper Back Protector.
Whatever armor you go with, make sure it’s actually CE rated. Beware of knockoffs on Amazon offering “CE 2 rated” back protectors for $20. Their CE must stand for “Conning Everyone” because a decent CE Level 2 back protector will run you closer to $50.
Is it worth saving those $30 if it means you’re spending $100k on spinal fusions and living in a wheelchair the rest of your life? I thought so!
Look for reputable brands like SAS-TEC, D3O, Alpinestars and Leatt. They will specifically state CE Level 1 or Level 2 and mention EN1621 on the label. Then you’re good to go.
Swapping out armor is easy – just pull it out (or shake it out, in my dad’s case) and slide in the new armor. Jackets worth anything will have slots for elbow and shoulder armor as well as a back protector. Back protector sizes vary, but there aren’t any standards unfortunately. Just go with what Revzilla says will fit on their size charts for each back protector.
Restoring a Leather Motorcycle Jacket
Finally we’re on to leather!
Leather can outlast the rider wearing it, if it’s cared for properly.

Maybe you rediscovered an old jacket in the depths of the basement or picked one up at a yard sale. Here’s how to bring a stiff and dry leather jacket back to life (maintaining it for the next generation? Read this)
CAUTION: Don’t even think about restoring a regular leather jacket and expecting it to protect you on the road like a motorcycle-specific leather jacket. The seams, leather treatment, and thickness are just not built to withstand the forces of a motorcycle crash. Don’t do it!
The Revival Process for a Leather Jacket
First, you’ll need to gather your supplies. You’ll want a couple soft clothes and some cleaning agents. I recommend Motul Perfect Leather. Just look at how it cleans up this jacket!
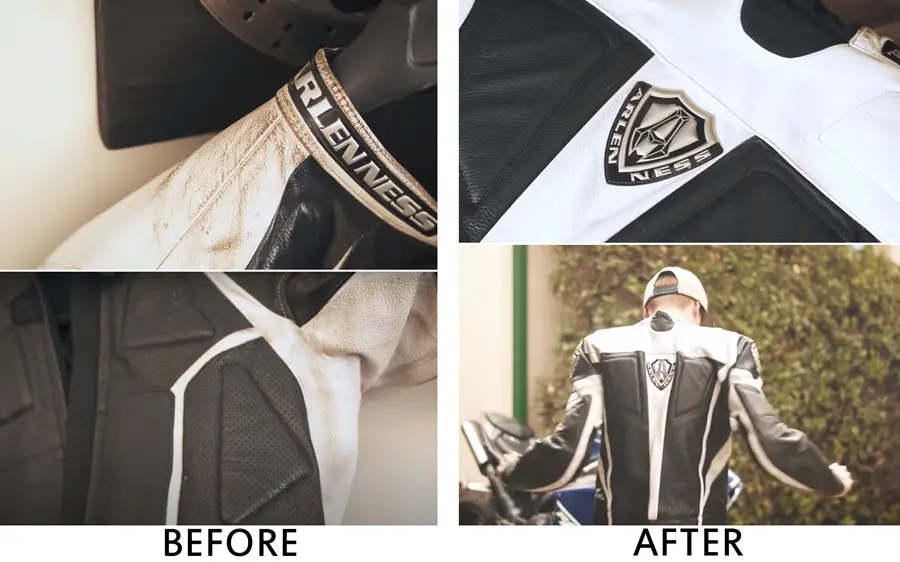
Your revival process might be as easy as thoroughly wiping down the jacket with leather conditioner (like Motul Perfect Leather) and leaving it to dry for a few days. If your leather looks rejuvenated and feels soft, you’re done.
But what if your jacket has cracks or scuffs in the leather that leather conditioner can’t revive?
You’ll need to fill those cracks with a leather crack filler. Like caulk for leather (but flexible) this second skin paints right on. After drying and dyeing to match the color of your jacket, even YOU might be fooled into thinking there was never a scuff at all.
Here’s a great tutorial video on how to use leather crack filler to repair cracks and scuffs in your motorcycle jacket’s leather. Everything you need to make that old leather jacket just like new.
Professional Repair for Motorcycle Jackets
Let’s be honest, sometimes we just can’t DIY our way out of everything.
If your jacket is under warranty, contact the company or the seller (like Revzilla). They might be able to help you out with repairs, or at least get you the right replacement parts.
If you want an expert to handle patches, zippers, snaps and more for you, consider these options:
- Local Tailor
- Local Shoe Shop
- Local Vintage Store
- Local Boat Cover or Tarp Maker (seriously)
Anyone who does custom work with heavy duty materials (like boat covers or old leather) will be able to handle motorcycle gear. If you go to a tailor, ask them if they’ve worked on motorcycle or equestrian gear before. You don’t want a tailor who has only ever sewn suits for bankers thinking they can apply the same process to your Alpinestars racing jacket.
If you don’t mind sending your jacket away, check out Anthony’s Leatherworks or Rugged Thread.
FAQs
How long is a motorcycle jacket good for?
A motorcycle jacket can last anywhere from 5-10 years or even more, depending on how well you take care of it and the quality of the materials. Armor often hardens up or disintegrates in under 5 years, but that’s easy to replace. Some cheaper textile jackets might lose their strength over time, especially at the seams. On the other hand, a well-cared-for leather jacket can last lifetimes. Treat your jacket right and it’ll have your back for years to come!
Storage matters too: if your jacket sits through the off-season, our motorcycle jacket storage guide explains how to avoid mold, mildew, cracked leather, and weakened textile panels.
Is Kevlar good for motorcycle jackets?
Yes, Kevlar is fantastic when it comes to motorcycle jackets. In crash scenarios, Kevlar provides excellent abrasion resistance and heat shielding, which means less road rash for you in case of a slide. Its lightweight and strong fibers also offer improved comfort and protection without adding too much bulk to your gear. It was designed to take bullets, after all, so it’s a good option for keeping you safe on the road.