Adventure Motorcycle Luggage Systems: A Guide for Newcomers
 Robert Baldinger
left for contents
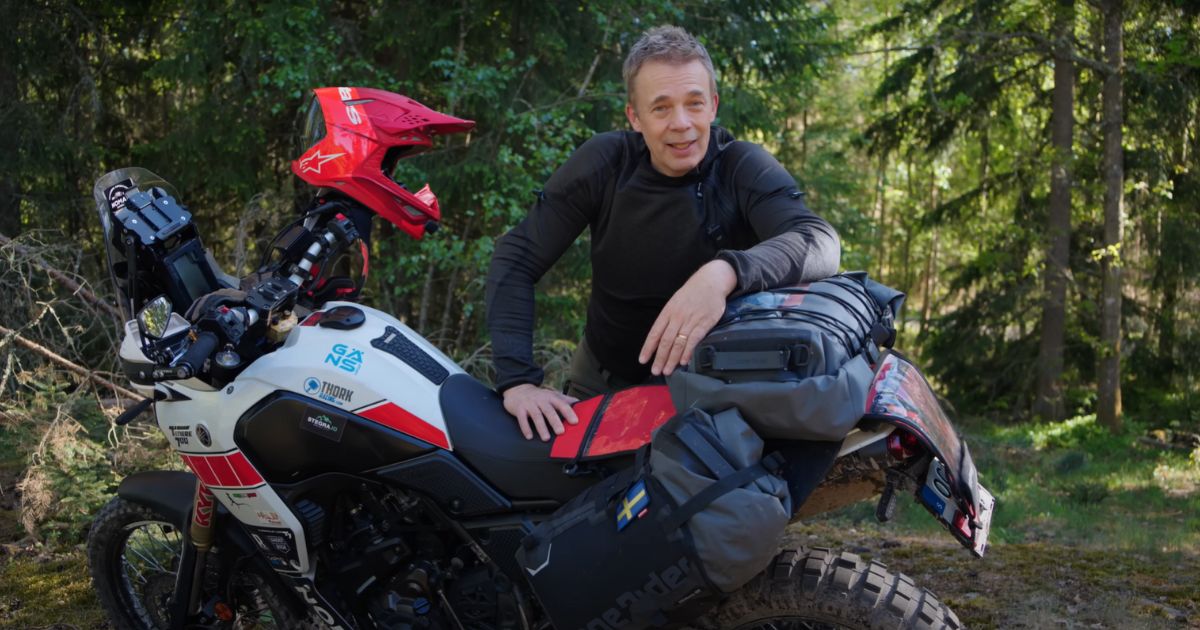
Hey guys, Robert here, back with another installment in my series aimed at helping those new to the adventure motorcycle world navigate the often overwhelming choices you’ll face. Today, we’re diving deep into the world of motorcycle luggage systems, specifically focusing on setups for camping adventures.
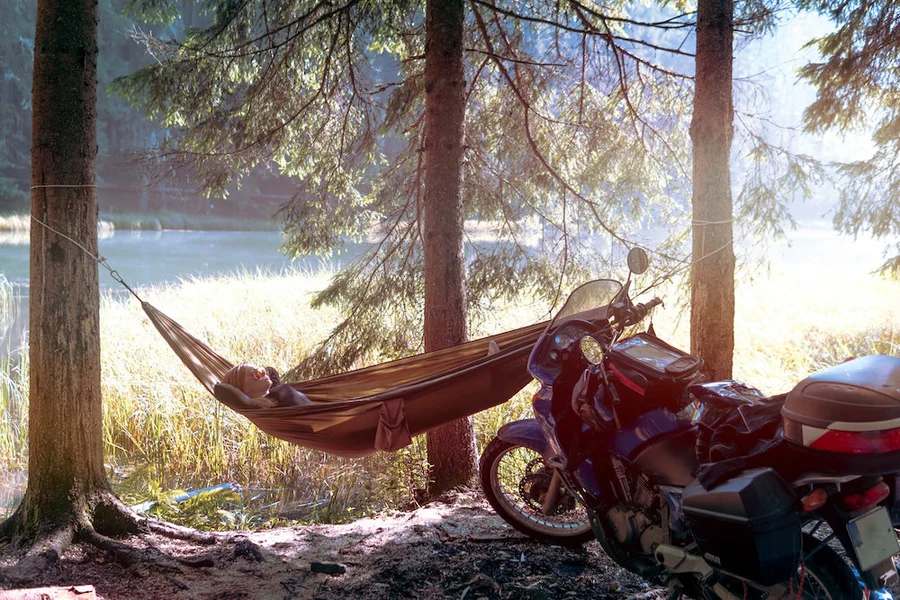
Why camping? Because that’s when you’re hauling the most gear – think cooking equipment, sleeping arrangements, changes of clothes, tools, and everything else you need to be self-sufficient on the road.
Before we get into specific types of luggage, I want to highlight three key takeaways right from the start that might not be immediately obvious but are crucial for setting up your adventure bike for luggage:
- Weight Placement Trumps Volume: It’s not just about how much you can carry, but where you carry it. The position of your luggage weight drastically affects your bike’s handling. Prioritize keeping weight low and close to the bike’s center for optimal control, especially when venturing off-road.
- Bigger Doesn’t Mean More Expensive: Choosing a larger luggage system can actually be more cost-effective in the long run, because you won’t be forced to invest in more compact and expensive camping gear just to fit.
- Soft Bags Are Safer for Off-Road: While aluminum boxes offer undeniable practicality, soft luggage systems, particularly rackless options, provide a crucial safety advantage when riding off-road. Their ability to give way in a fall can significantly reduce the risk of leg injuries.
These are the principles that have shaped my own luggage choices over years of adventure riding, and they’re what I want to unpack for you today. Some of what I’ll discuss are objective truths, grounded in physics, but we’ll also explore different luggage systems, and naturally, I’ll share my personal preferences and experiences. Remember, my choices might not be the perfect fit for you, but my aim is to give you the insights to pick the cherries, so to speak, and make informed decisions for your own adventures.
If you’d rather watch this guide, here’s my original video on the topic.
Weight Placement: The Golden Rule of Luggage
Let’s start with the absolute foundation: weight placement. When we load up our bikes with gear, the weight and where we position it has a dramatic effect on handling. Think of it this way: the ideal spot for weight is as low and centered as possible, ideally down by the foot pegs. That’s essentially where motorcycles are designed to carry weight for optimal balance and handling.
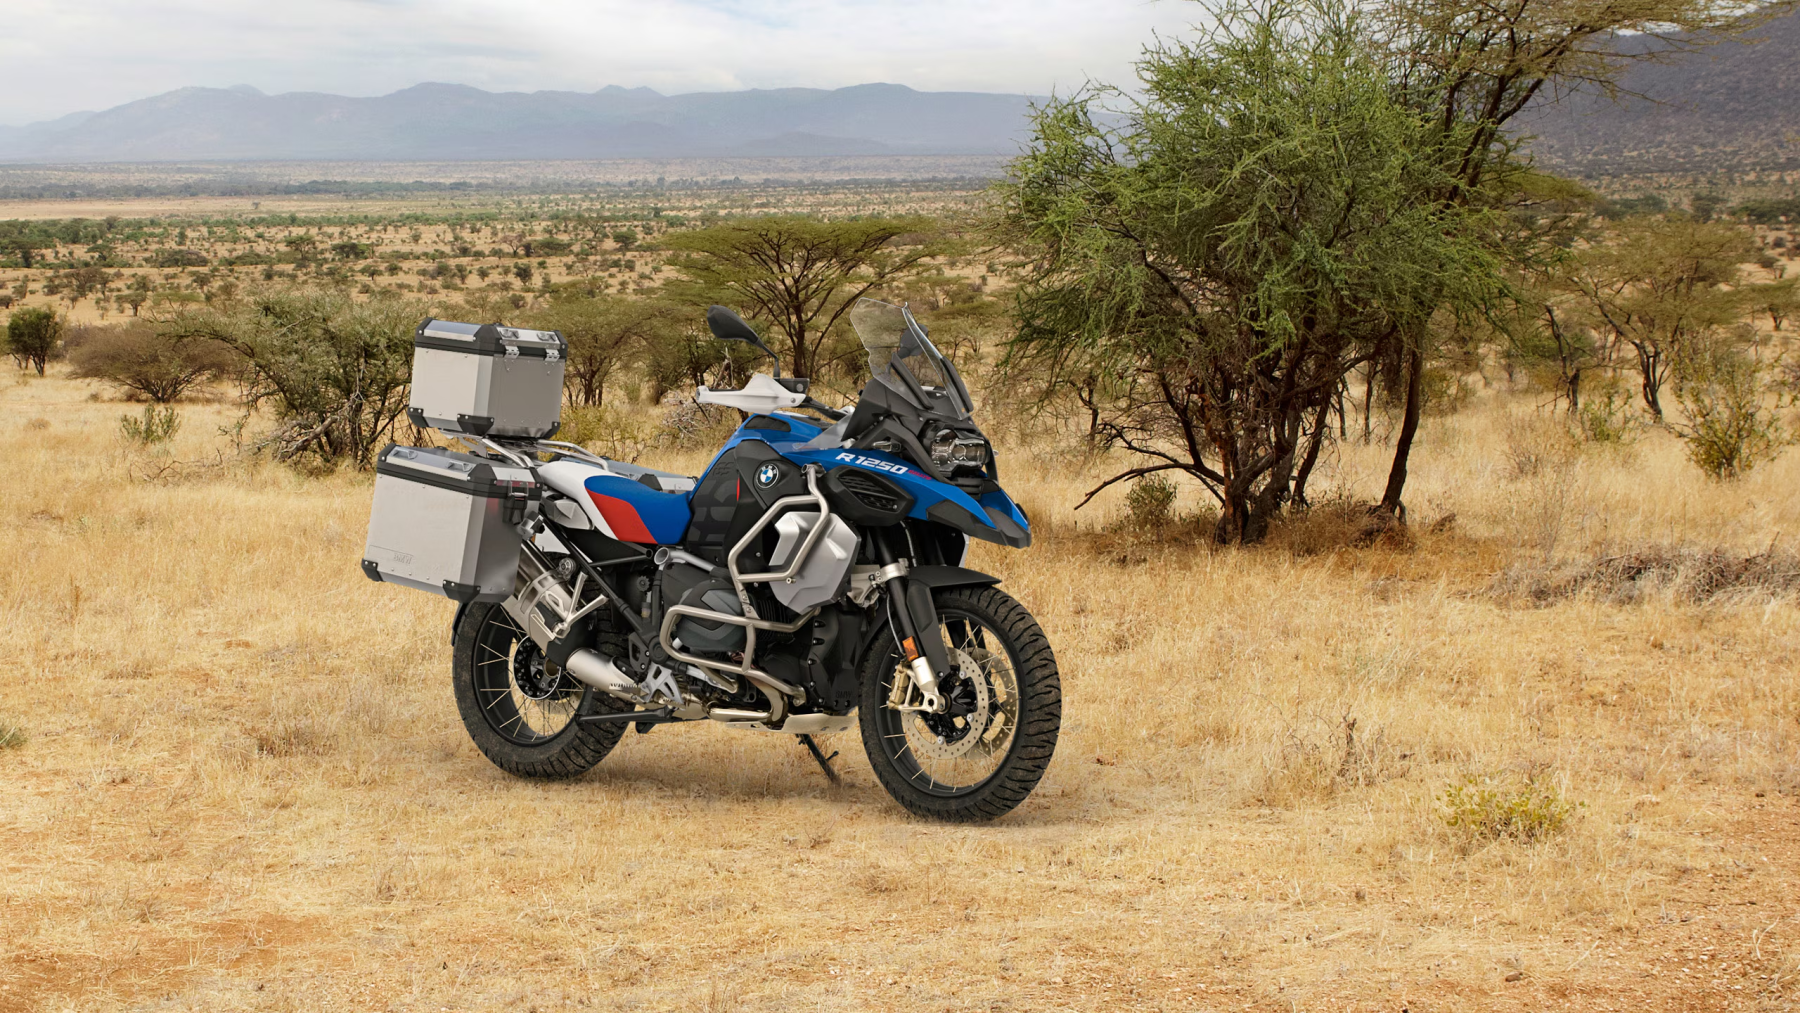
The further we move weight away from those foot pegs, the worse the handling becomes. Imagine taking weight and shifting it backwards, and further back, and even higher up and further back. That’s exactly what happens when you load up a top box.
Top boxes can be incredibly practical for commuting or road touring, no doubt. But if you have one, especially for adventure riding and particularly for off-road, be absolutely mindful not to put the bulk of your weight in there. Keep the heaviest items as close to the foot pegs as you can, and you’ll immediately notice a positive difference in how your bike behaves. The closer to the foot pegs, the better – that’s the mantra to remember.
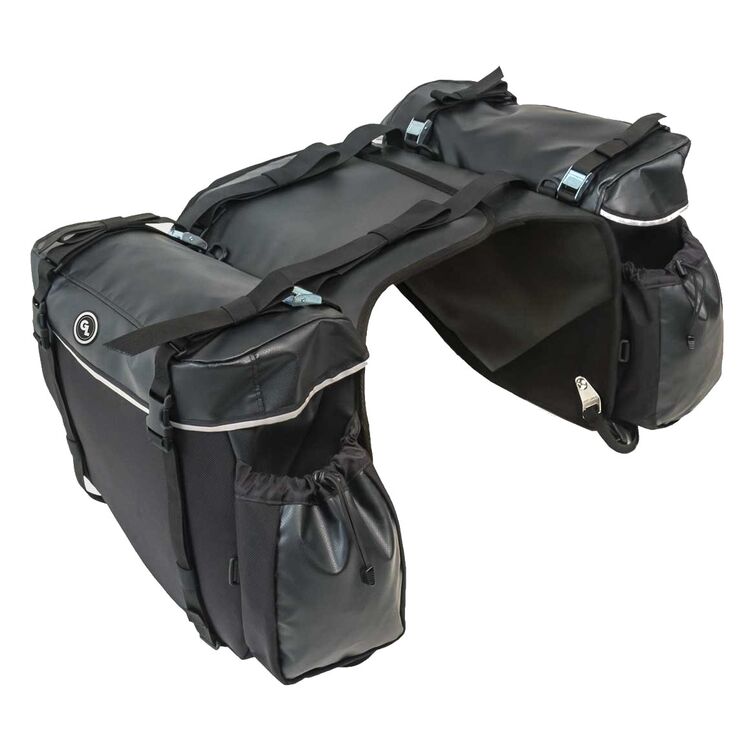
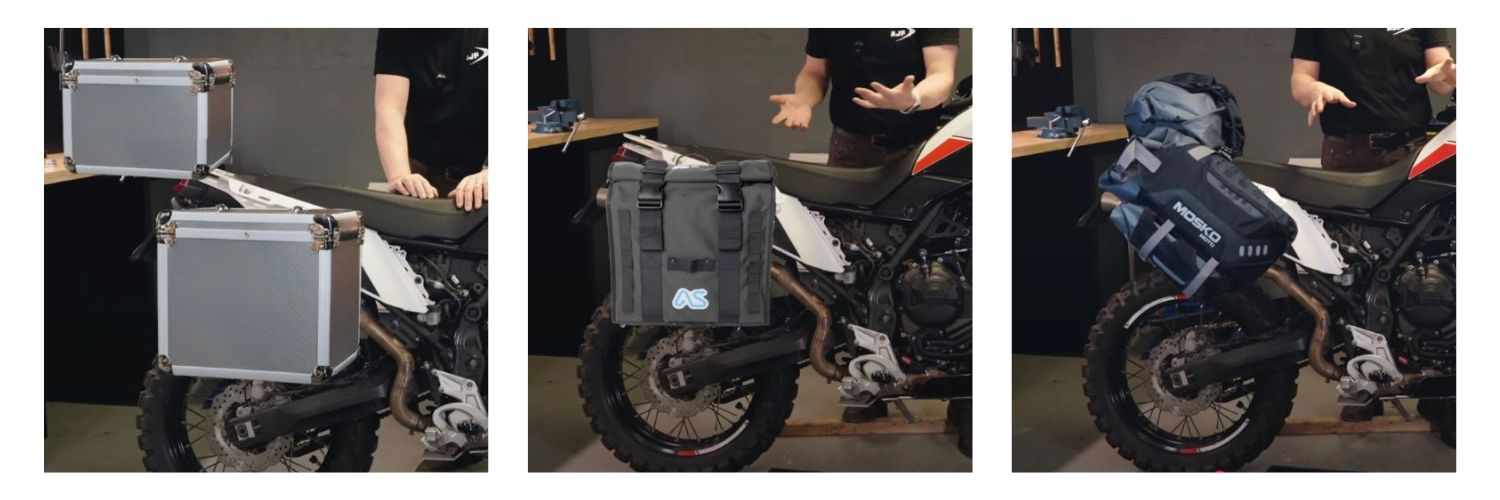
Aluminum Boxes: Practicality vs. Off-Road Safety
Now, let’s talk about aluminum boxes, often called hard panniers or hard cases. They’re undeniably practical. Packing and organizing your gear inside them is straightforward. They offer security, as they can be locked. They’re generally watertight, which is a huge plus, and they’re versatile around camp. You can take them off the bike and use them as seats, side tables, or even cooking surfaces in a pinch.
However, and this is a big however, you should only really consider aluminum boxes if you’re sticking to primarily on-road riding and very mild off-road at most. There are two major downsides when you start venturing into more active off-road riding: durability and, more importantly, safety.
When you’re off-road, especially if you’re learning or pushing your limits, falls are part of the game. Even slow-speed drops and minor crashes are common. Aluminum boxes, while seemingly tough, react to impacts like a beer can. Once you dent or buckle them, especially on a trip, it can be incredibly difficult to reshape them so they seal properly again, and maintain their structural integrity.
The more critical issue is safety, specifically leg safety. Off-road riding often involves paddling with your feet for balance in tricky situations, or even putting a foot down to catch yourself. If your leg gets pinned between the ground and a rigid aluminum box in a fall, those boxes aren’t going anywhere.
It’s easy to see how a leg could get trapped and crushed against these hard boxes because they simply don’t give way in a fall. Leg injuries, sometimes serious ones, are a real risk. This is the primary reason why, the more serious off-road riding you plan to do, the more strongly I recommend considering soft luggage instead.
But for road riding between campsites, they might be the right choice for you.
For top security on your rides, don’t miss our guide to the best motorcycle locks.
Soft Racked Bags: A Safer, More Flexible Option
Next up are soft, racked luggage systems, often referred to as soft panniers or soft bags with racks. These offer a significant safety advantage over hard boxes. Because they’re made of fabric, they will give way if you get your leg trapped in a fall, reducing the risk of injury. They offer a degree of impact absorption and are generally more forgiving in crashes.
They still retain some of the practicality of hard boxes. Many are designed as detachable bags that you can easily remove from the bike and carry into your tent or hotel. They often feature roll-top closures with waterproof liners, making them effectively waterproof or at least highly water-resistant. They can also be secured, often with locking straps or cable locks, to deter casual theft, though they’re obviously not as secure as a locked metal box. Packing is generally easy, although organizing smaller items can sometimes require packing cubes or dry bags within the panniers.
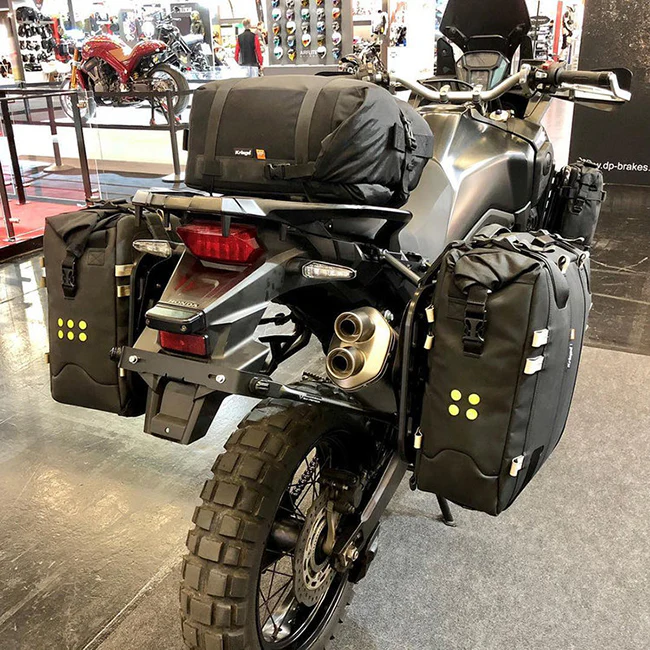
A key advantage of soft racked bags is their flexibility. When they’re not fully packed, or even when empty, they can often be compressed and made smaller, reducing the overall width of your luggage setup. This is a big plus when you’re riding without a full load or navigating tighter trails.
One potential downside of racked soft bags is that, as the name suggests, they require a pannier rack to be mounted on your motorcycle. This rack adds weight to the bike, although typically less than hard pannier racks. More noticeably, racks add width to your bike, even when the bags are removed.
I’ve seen setups where the racks and bags combined actually make the luggage wider than the handlebars. This is something you absolutely need to be aware of and check. Whatever luggage system you choose, ensure the widest point of your luggage is narrower than your handlebars. Or at least be aware of their width.
Why is this important? Filtering through traffic, navigating tight trails, or even just maneuvering in parking lots becomes a nightmare if your panniers are wider than your bars. If your handlebars can fit through a gap, you need to be confident your luggage will follow.
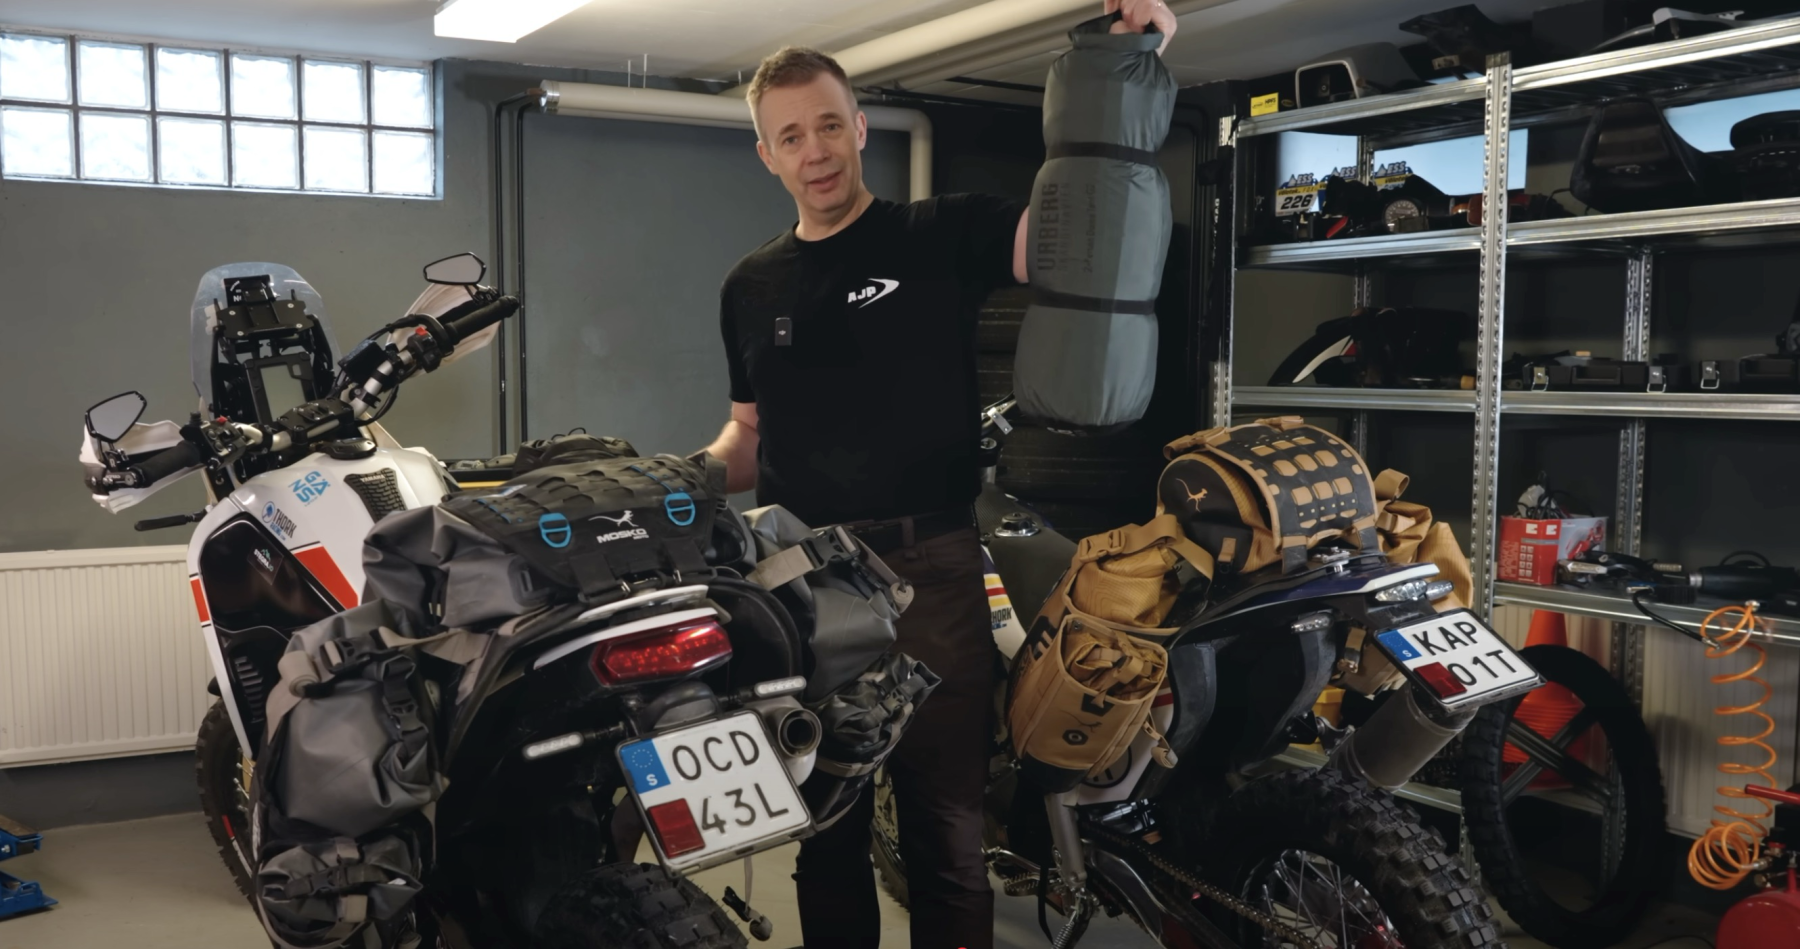
Rackless Systems: My Choice for Versatility and Narrow Profile
Now we come to rackless luggage systems. This is the style I personally use and prefer for my adventure riding. The main reason I’m drawn to rackless systems is their versatility and modularity. Because they don’t require a dedicated rack, you can essentially throw them over almost any motorcycle.
This is a huge advantage. I can easily move my rackless system between different bikes. I can lend it to a friend if they need luggage for a trip. I can use it on my older Suzuki DR650 just as easily as on my Yamaha Ténéré 700. This adaptability is invaluable if you have multiple bikes or anticipate changing bikes in the future.
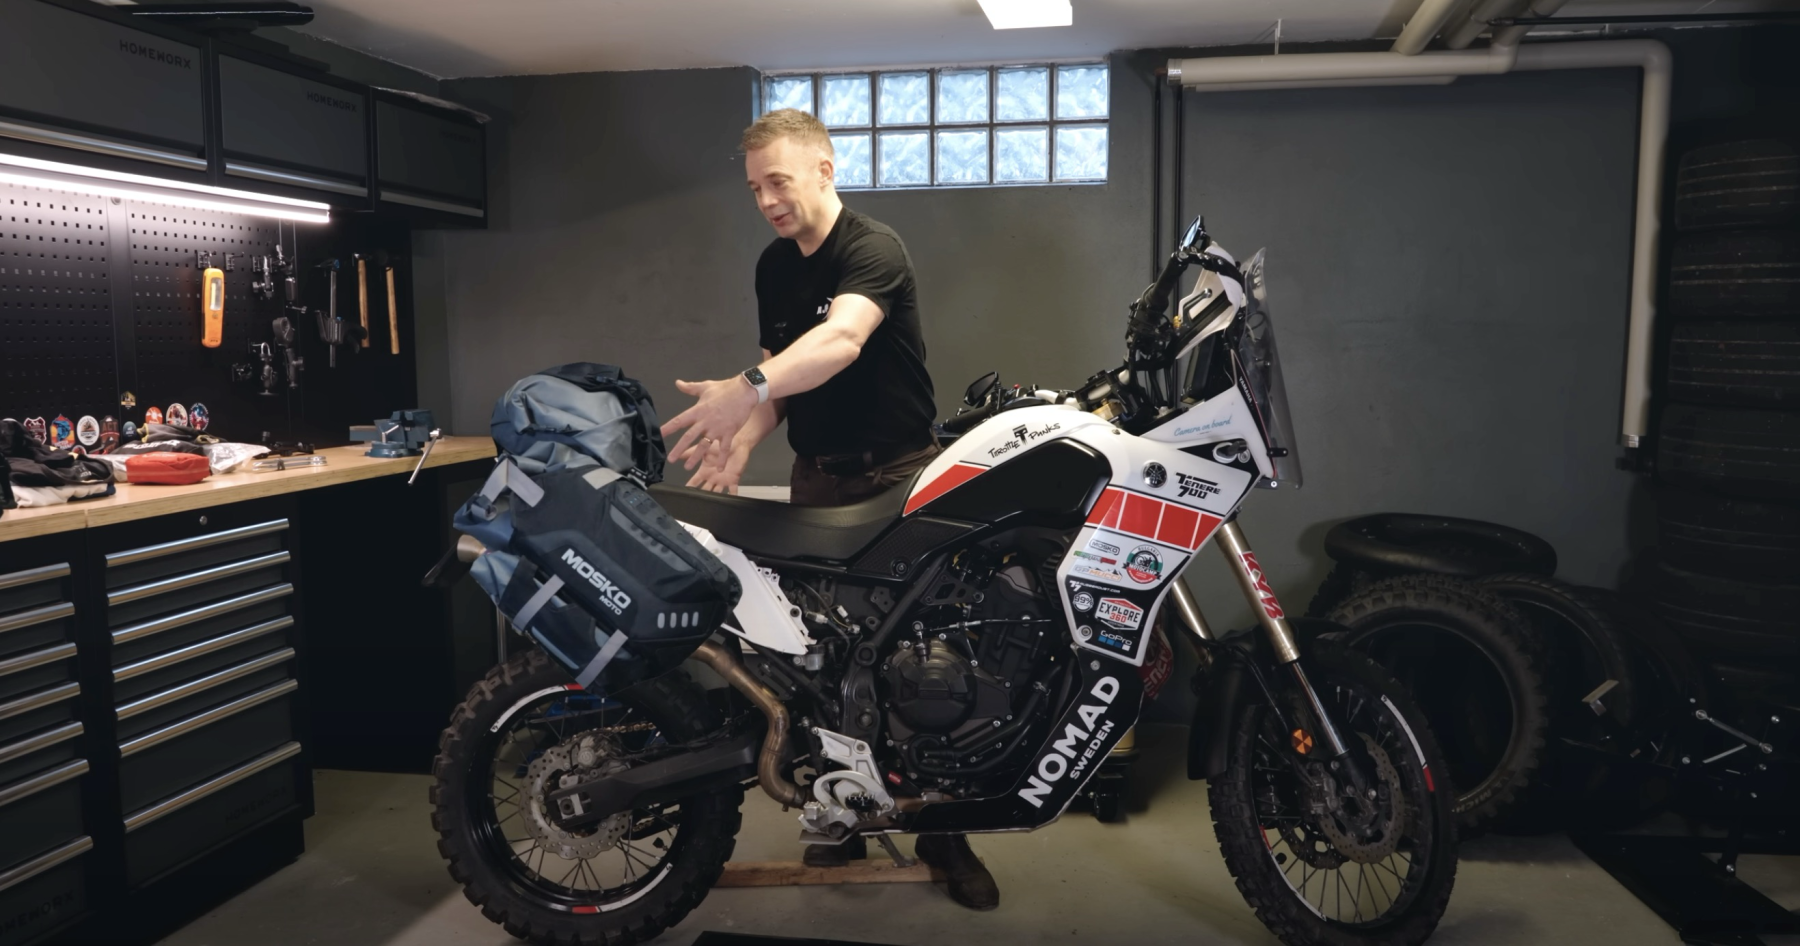
Beyond versatility, I also appreciate that rackless systems generally keep the luggage much narrower and closer to the bike’s centerline. A wide luggage system, regardless of type, can contribute to lateral instability, especially in off-road situations or strong crosswinds. Keeping the profile narrow improves handling and maneuverability, particularly in technical terrain.
Of course, luggage choice is always a balance of preferences and priorities, and how much gear you want to bring along. Rackless systems often require a bit more careful packing and organization compared to rigid boxes, but the benefits in terms of versatility, weight savings, and narrow profile are, for me, significant.
My preferred rackless systems are from Mosko Moto.
Hybrid Solutions: Bridging the Gap
There’s also a sort of hybrid approach to luggage, systems that bridge the gap between fully racked soft bags and completely rackless setups. The first set of proper adventure luggage I ever bought falls into this category: the Enduristan Monsoon 3 panniers.
Like rackless bags, these are designed to be thrown over the seat of pretty much any motorcycle. They work well and are relatively easy to fit and remove. However, these hybrid bags typically benefit from, or even require, some form of minimal rack or support structure.
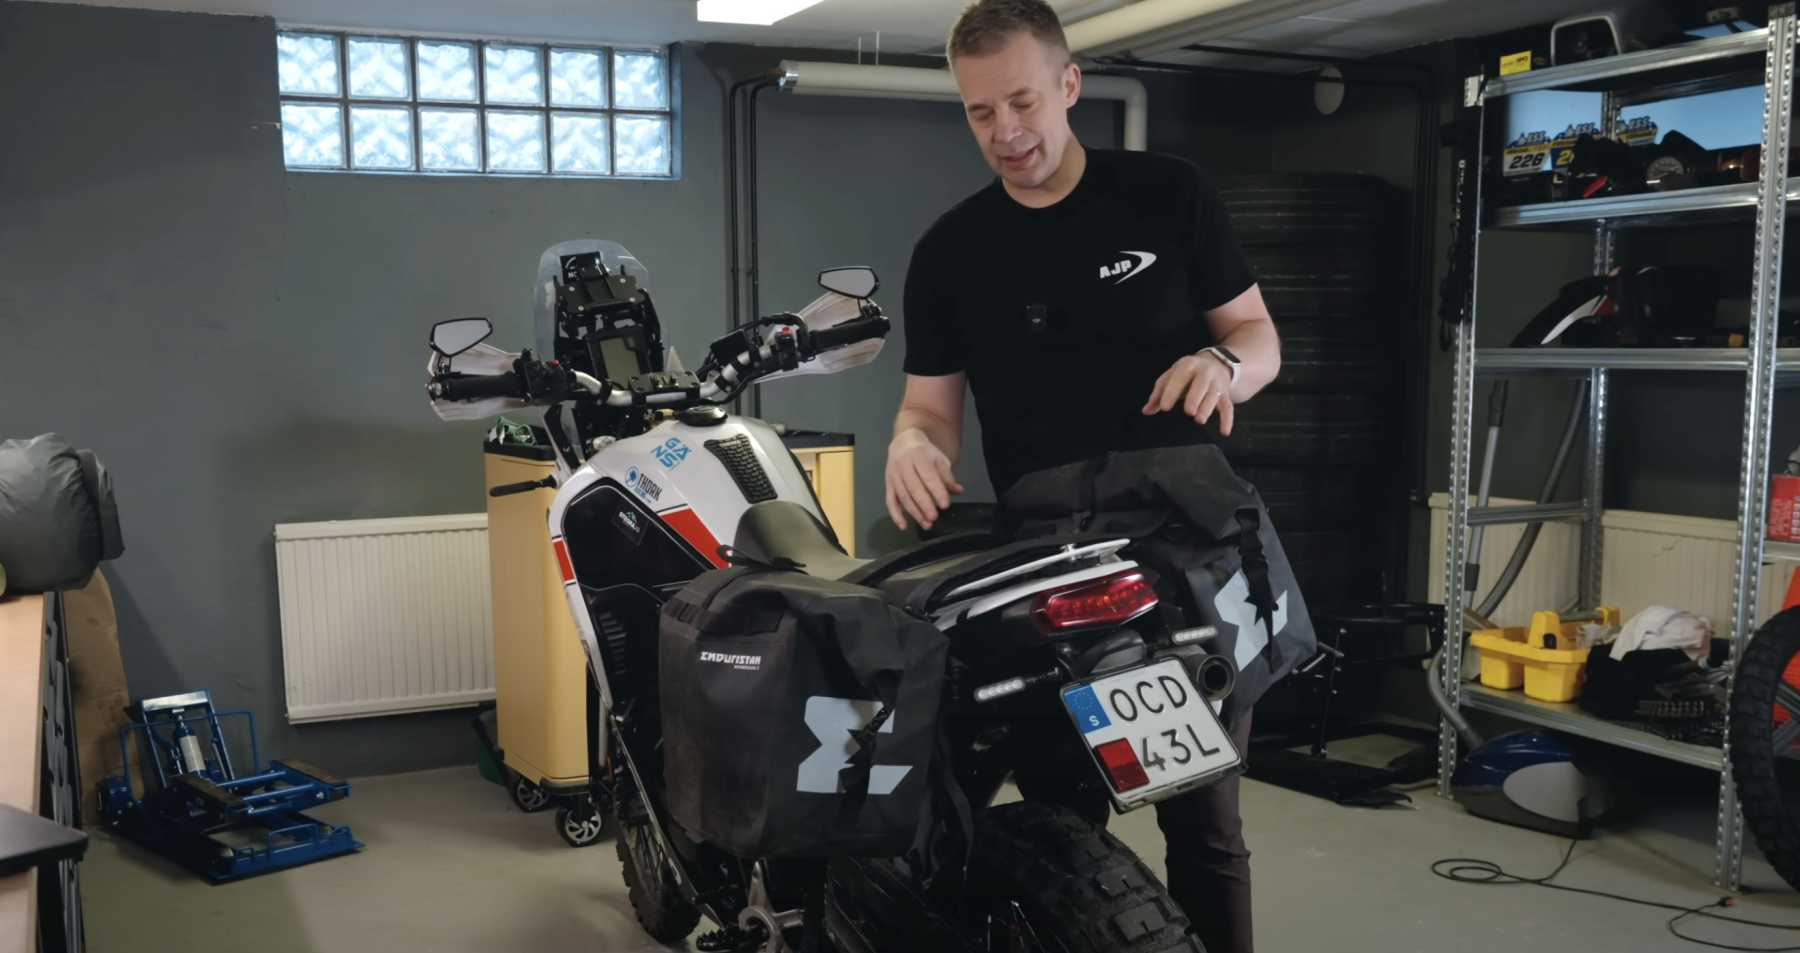
The reason for this is stability, especially when riding off-road. While they don’t need the full, heavy-duty racks of traditional soft panniers, without some support, these bags can flap around quite a bit, particularly the lower sections that hang further out from the bike’s frame. This flapping can be distracting, and potentially unstable at higher speeds or in rough terrain.
For bags like the Enduristan Monsoon 3, you ideally want to use some kind of mini-rack or side support. These provide anchor points to strap the bags to, securing them against the bike’s frame and preventing excessive movement. These mini-racks are typically much lighter and less bulky than full pannier racks, offering a good compromise.
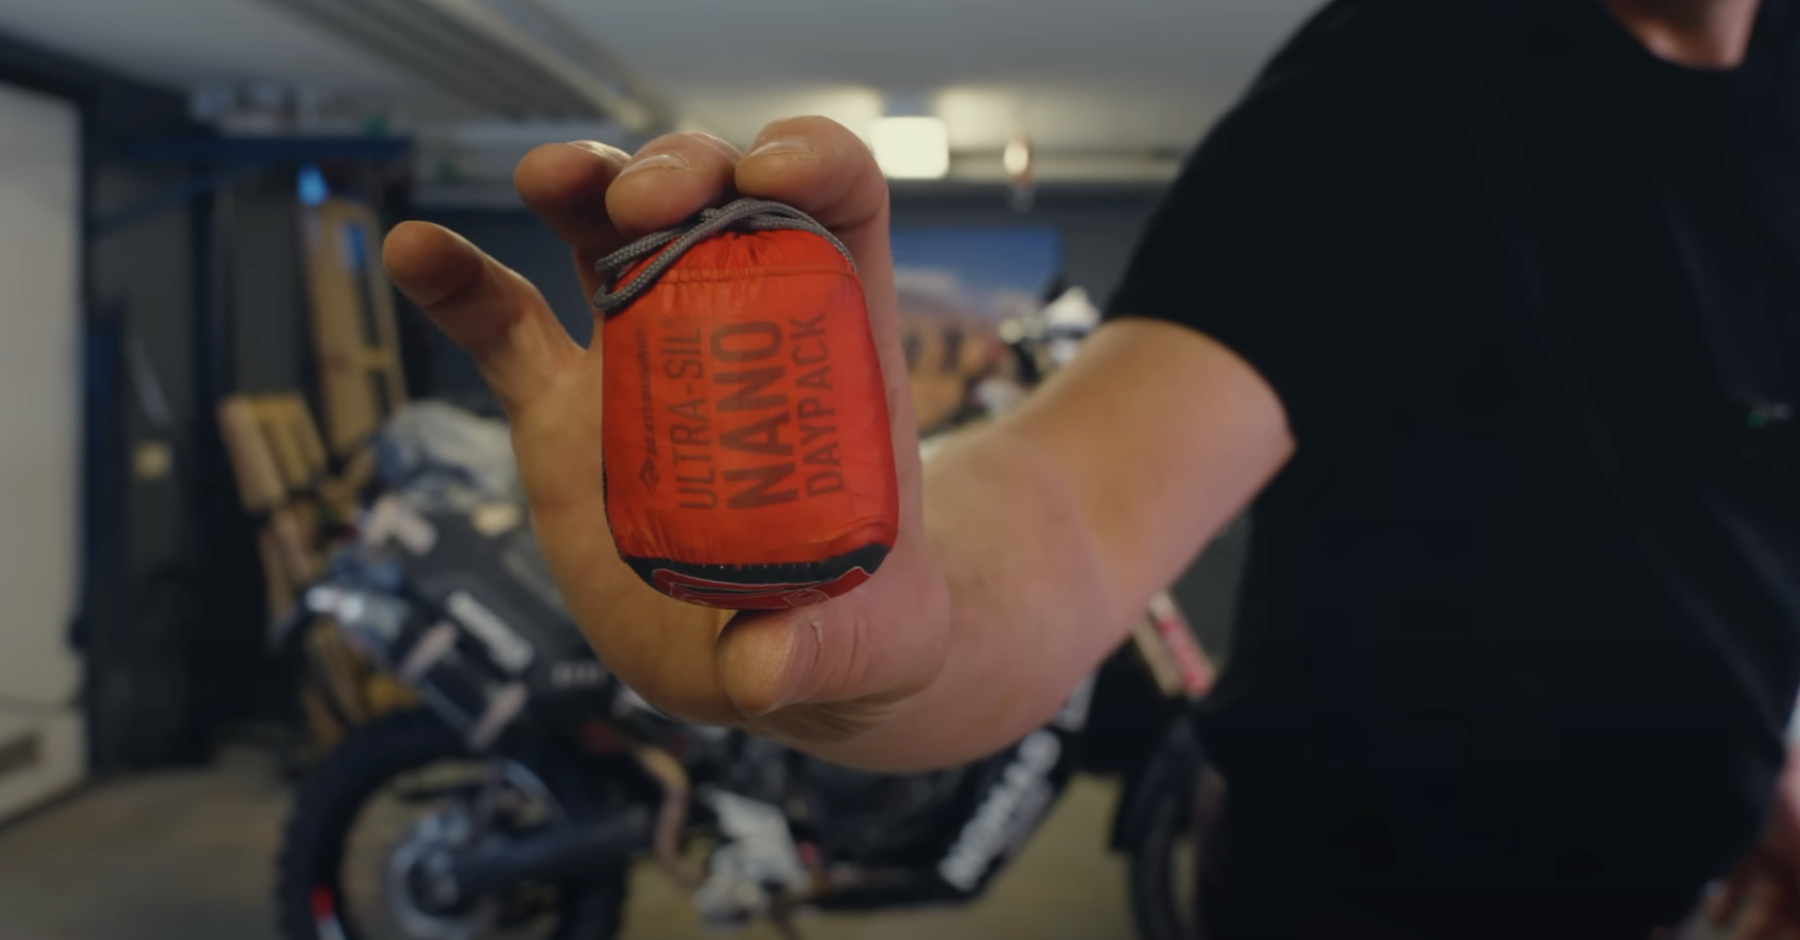
The Monsoon 3 bags were a great starting point for me. They were relatively lightweight, reasonably priced for their quality, and offered a good amount of volume – 30 liters per side bag, plus a 30-liter top bag, totaling 90 liters of capacity. That’s a lot of space, though as we’ll discuss next, volume isn’t everything.
Unfortunately the Monsoon 3 are no longer sold, but the Giant Loop Siskiyou gives you an idea for this style – basically two soft panniers with fabric in between that goes over the back of your ADV bike’s seat.
Rugged, rackless soft panniers with 70 L capacity, quick top-loading access, and bulletproof construction—ideal for secure, flexible adventure travel.
- Lock-free design mounts in minutes and fits most bikes
- Massive capacity replaces top bags for shorter trips
- Impact-resistant Cordura and internal padding stand up to abrasion
- External pockets and lashing points boost versatility
- Lightweight build keeps bike handling sharp
- May need exhaust guards to prevent heat damage on some bikes
- Velcro fastening can loosen; buckles would offer finer adjustment
Volume: More Isn’t Always Better
Let’s shift gears and talk about volume. Regardless of the type of luggage system you choose – aluminum boxes, soft racked bags, rackless, or hybrid – volume is a critical consideration. It’s tempting to think “more is better,” but that’s not necessarily the case, especially for adventure motorcycling.
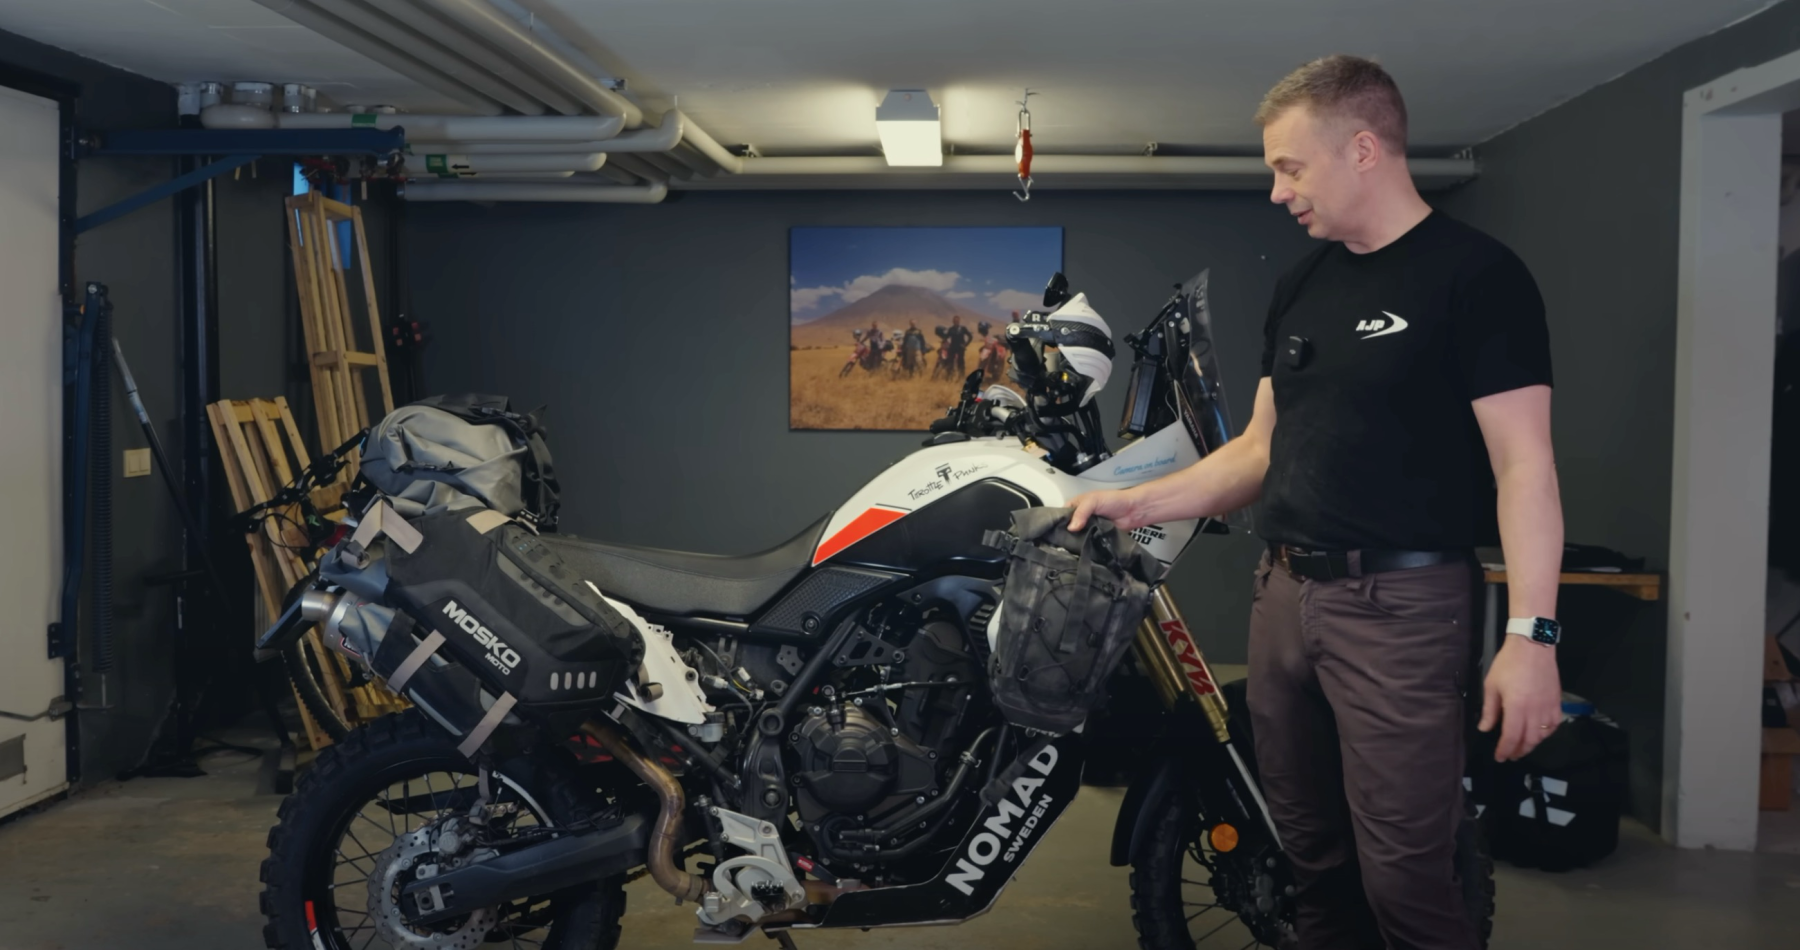
I currently use the Mosko Moto Reckless 40 system, which, as the name suggests, offers 40 liters of total capacity. Recently, I borrowed Mattias’ 80-liter system, effectively double the volume of my usual setup. Interestingly, I discovered that, for my style of riding and camping, using the smaller 40-liter system actually ended up being more expensive than using the 80-liter system in some ways.
Let me explain. When I first started adventure camping, I was on a budget, especially for camping gear. My sleeping arrangements, in particular, were budget-oriented. I had a decent but bulky and heavy tent, weighing around three kilos. My sleeping bag was synthetic (reader: cheaper), and my sleeping mat was also fairly bulky.
To fit this budget camping gear, I needed a large volume luggage system. The 80-liter system was perfect for swallowing my tent, sleeping bag, and mat, along with clothes, cooking gear, and other essentials.
However, when I switched to the 40-liter system, I realized I could still bring almost the same amount of essential gear, but only by drastically reducing the bulk and weight of my camping equipment. This meant investing in a much smaller and lighter ultralight tent, a down-filled sleeping bag (which compresses incredibly small), and a lightweight, compact sleeping mat.
These lightweight items, while individually more expensive than their budget counterparts, pack down to an astonishingly small size. I can now fit my entire sleeping arrangement – tent, sleeping bag, and mat – into just one of the Reckless 40’s 14-liter side bags, with room to spare. The remaining space in the 40-liter system is more than sufficient for my clothes, cooking equipment, tools, and other necessities.
Because I had to invest in significantly pricier ultralight camping gear to make the 40L system work, the savings on using the 40L vs 80L system were canceled out. But, if I were still using my bulky budget tent and sleeping bag, the 40-liter system simply wouldn’t be large enough.
The takeaway here is that if you don’t camp frequently, or if you’re just starting out and on a tight budget, a larger volume luggage system can actually be the cheaper option. It allows you to use more affordable, albeit bulkier, camping gear without needing to spend a fortune on ultralight equipment. The luggage itself might be slightly more expensive, but the total cost of your setup could be lower.
The reason I personally opted for the smaller 40-liter system is a conscious decision to force myself to pack lighter and smarter. I have to be very deliberate about what I bring, how I pack it, and embrace a multi-purpose philosophy for my gear. This approach minimizes weight, makes the bike more agile, and simply reduces the amount of “stuff” I’m carrying around.
You’ve probably heard the expression “light is right.” While there’s truth to it, especially for more technical riding, it’s not universally applicable. If you’re planning more relaxed adventure touring, primarily on pavement or well-maintained gravel roads, and you value comfort and convenience, there’s absolutely nothing wrong with bringing more gear.
Just always remember the golden rule: pack as close to the foot pegs as possible. Building a towering stack of luggage behind the rear axle will severely compromise your bike’s stability, particularly if you encounter unexpected off-road sections or need to make quick maneuvers.
Extras: Expanding Your Carrying Capacity
Beyond your main luggage system, there are several other places on your bike and on your person to carry extra gear. These “extras” can be really useful for optimizing weight distribution and carrying frequently accessed items.
If your bike has crash bars, mounting auxiliary bags to them is a popular option. I personally don’t use crash bar bags, but they can be a good way to even out weight distribution and carry items you need relatively quickly but don’t need constantly. However, be mindful that anything you put in crash bar bags is vulnerable in a fall. These bags are likely to take a beating in even a minor tip-over. So, don’t store anything fragile or essential in crash bar bags.
I always ride with a backpack. It’s another convenient place to carry some gear. I typically use a riding backpack for items I want quick access to, such as extra gloves, a warm layer, snacks, or my camera. A backpack is also incredibly handy when you stop for the night. If you want to take a hike, explore a town, or just wander around camp, having a backpack readily available is invaluable. Plus, most riding backpacks have a built-in water bladder, which is essential for staying hydrated while riding, especially in warmer conditions or during strenuous off-road sections.
In addition to my main riding backpack, I also often carry a smaller, packable backpack – a “mini-backpack” if you will. Mine is a 20-liter pack, and it’s designed for temporary use. It packs down incredibly small when not needed. This type of backpack is perfect for quick errands. If I need to ride into town for groceries, or for the last leg of a journey before setting up camp and want to grab supplies, it’s incredibly convenient to have. It’s essentially a durable, motorcycle-friendly grocery bag that you can comfortably carry on your back, freeing up your hands on the bike.
Tank bags are another popular extra luggage option, available in a wide range of sizes and styles. However, on some bikes, like my Yamaha Ténéré 700, fitting a large tank bag can be a bit awkward. The T7’s tank is quite tall, and a big tank bag can end up looking and feeling like a chimney from the Titanic perched in front of you. On bikes with flatter tank profiles, larger tank bags are much more integrated and less obtrusive.
I generally prefer smaller tank bags. They’re ideal for keeping essential items readily accessible while riding – things like your phone, wallet, passport, maps, sunglasses, multi-tool, tire pressure gauge, and snacks. I also tend to keep valuables in my tank bag, as it’s easy to detach and take with you when you leave the bike unattended. A tank bag is a great “go-bag” for essentials and valuables when traveling.
Modularity and Adaptability: Key to Long-Term Satisfaction
Whatever type of luggage system you ultimately choose, I strongly recommend prioritizing modularity and adaptability. I like having a system that allows me to add auxiliary bags when needed, and also to scale down the main luggage system for shorter trips or more minimalist adventures. The ability to adapt your luggage setup to different trip lengths and riding styles is key to long-term satisfaction.
There are so many excellent luggage options available to adventure motorcyclists today. My advice is to start by deciding on the overall style of luggage that best suits your riding: do you lean towards the polished, secure aluminum boxes, the flexibility of racked soft bags, or the versatility and narrow profile of rackless systems?
Once you’ve narrowed down the style, you’ll find numerous brands offering different solutions within each category, with variations in quality, materials, weight, sturdiness, and features. I personally lean towards Mosko Moto bags, and I’ve mentioned the Reckless 40 system I use. I appreciate their robust construction and durability. As I jokingly said, they’re built so tough my kids could probably use them after they dig me out of a ravine, and maybe even their kids after them! They are truly built to last.
But ultimately, the “best” luggage is subjective and depends on your individual needs and preferences. I highly recommend reading user reviews and comments. On my YouTube channel and videos, for example, the comments sections are often filled with valuable insights and real-world experiences from other riders sharing what luggage systems they use and what they like or dislike about them.
So, start the conversation! Ask questions, read reviews, and tap into the collective knowledge of the adventure riding community. This article is just an icebreaker, a starting point to guide you through the initial considerations.
Good luck with your luggage choices. It’s a crucial part of setting up your adventure bike, but also a really exciting part of the process.